


Fender Twin Reverb Amplifier Speaker Grille Replacement
In the process of working on the Music Room I was looking at the Fender Twin Reverb Amplifier and noticing how rough the speaker grille was looking. I've tried to determine how old the amplifier is. I believe the amplifier was made in the mid-70's based on numerous Internet searches for details and the tube chart patent numbers, and knowing the amplifier originally had the black/silver grille cloth.
In the 80's the original speaker black/silver grille cloth was replaced as it was damaged or separated from the frame. At that time some new brown speaker grille cloth was purchased locally at Radio Shack and I replaced the cloth. Back then I was unaware of any sources where Fender grille cloth could be purchased, plus I had a limited budget to work with.
For many years the amplifier wasn't used very often, and for a few of those years the music room became a "Slot Car Track Room". After the slot car period passed, the room began to collect lots and lots of "stuff". I have volunteered for a not-for-profit for many years and for a while there were several donated HP DeskJet printers stacked next to the amplifier. One day, when moving the printers, quite a bit of black ink unexpectedly poured out from the bottom of one of the printers onto the face of the amplifier's grille cloth, the carpet, and my shoe. Cleanup of that type of ink was difficult. Up to that point I had never seen ink run out of a printer like that!
Looking closely at the brown grille cloth, besides the spilled mess, I see I didn't do that good of a job on it back then. So, now seemed like a good time to redo the speaker grille cloth again and clean things up.
I am providing the detailed steps I took to replace the speaker grille cloth this time hoping they might help others. I'm not an expert on this type of work; I'm just some amateur guitar player who plays at home and with friends occasionally. So, these steps are just what I thought would be good. A real professional might pick this apart and probably wouldn't like that I replaced the grille cloth with "Genuine Fender Black Grille Cloth" instead of the original black/silver grille cloth. I wanted to go with black because I think it looks better than the black/silver, and I also have a small Fender practice amplifier that has black grille cloth and it looks very nice.
Before starting this project I watched this How to Cover A Speaker Baffle with Grille Cloth YouTube video for pointers from someone who has done a lot of speaker grille replacements. It wasn't a Fender Twin Reverb amplifier he was working on, however, many of the steps were appropriate. Thank you "Uncle Doug" for a great video!
Disclaimer: The dimensions I recorded worked well for the amplifier I was working on. If you pursue using some of these steps be sure to verify the dimensions of your amplifier and adjust accordingly. Fender Twin Reverb amplifiers of newer or older age may require different dimensions and techniques!
I don't know if anyone will ever look at this webpage, but if you do and would like to ask any questions, you are welcome to send an email to me! Ok, no more blah, blah, blah, let's get on with it!
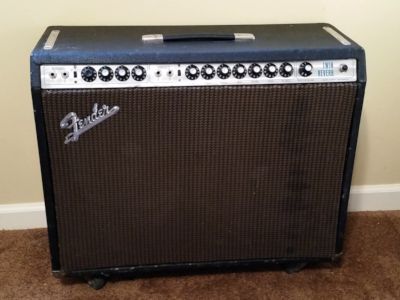
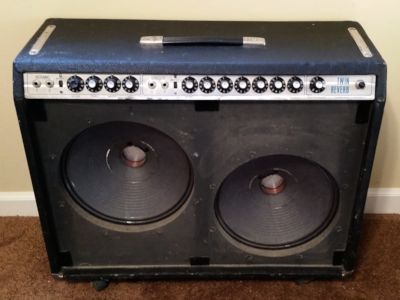
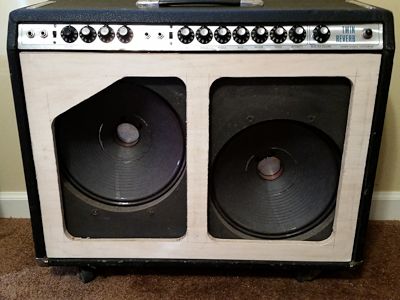
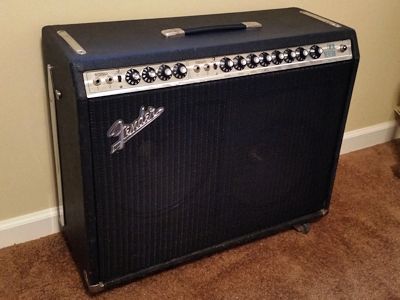
Here's a look at the Fender Twin Reverb amplifier before starting.
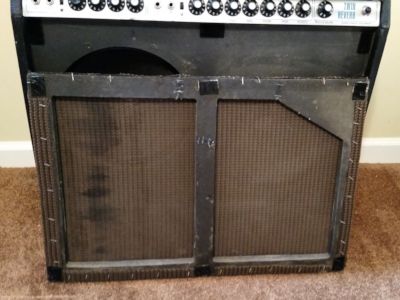
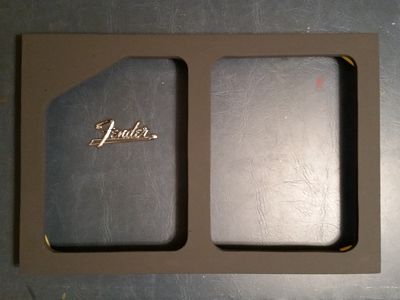
This is the back side of the old speaker frame. It's made of particle board and fastens to the amplifier with Velcro in the corners and middle of the frame.
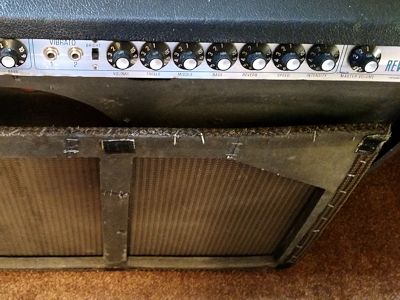
Here's a closer look at the old frame. One can see it's a bit warped at the bottom, and there are three locations where the particle board was broken and repaired in the past.
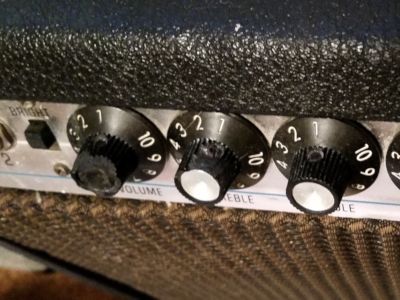
Two of the knobs were damaged at some point.
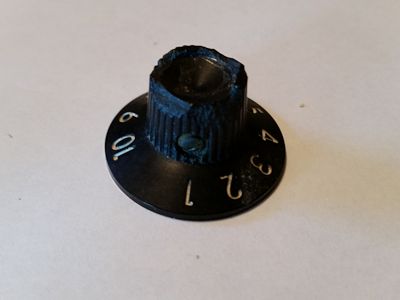
This is a closer look at the front of the knob in the worst condition. More about the knobs later.
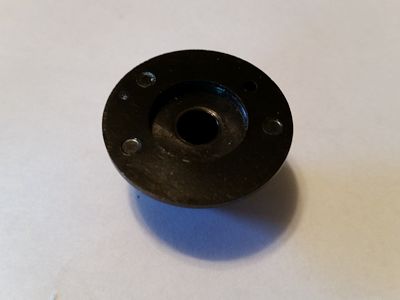
The back of the knobs all look like this one.
The amplifier without the grille cover.
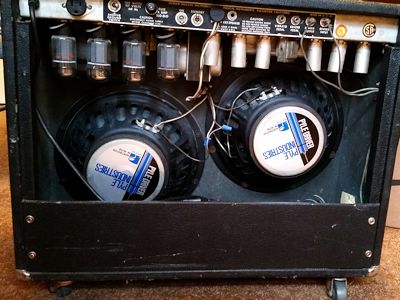
Back of the amplifier.
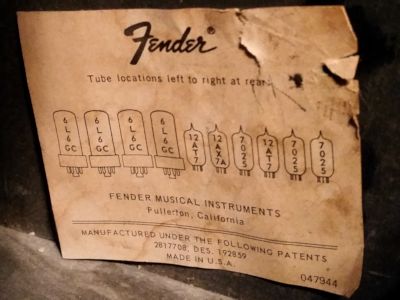
Here is the Tube Location Diagram from inside the amplifier. From what I've read on the Internet on several websites, sometimes there is a code stamped on the tube location diagram that you can break down to determine when the amplifier was manufactured. Unfortunately, this diagram does not include the stamp. However, an Internet search on "patent 2817708" and "patent 192859" turned up some details. Also a search on "047944".
I also read where another way to get a close estimate of when your amplifier was made is to read the date codes on the transformers. The code can supposedly be found on the power transformer, output transformer, choke, and reverb transformer. I was unable to see any codes on one transformer and did not look for the others. It's possible some of the transformers may be in the chassis and I didn't want to go that far.
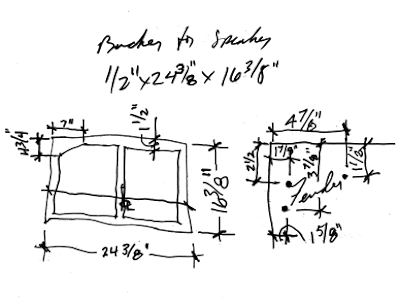
Shown above is a slightly cleaned up version of the handwritten notes I took for creating a new speaker grille frame. For a clear version that's easy to read, see the Speaker Grille Frame Plan . The overall size of the new frame is about a ¼" smaller than the width and height of the opening in the front of the amplifier. This will leave about an ⅛" gap around the finished speaker grille frame when the grille cloth applied.
My thoughts on the ⅛" gap is that it leaves a bit of space to be able to insert a tool to remove the speaker grille frame if needed. If there was less of a gap, removing the frame could be more difficult. However, you are welcome to make the frame a bit larger if you prefer less of a gap.
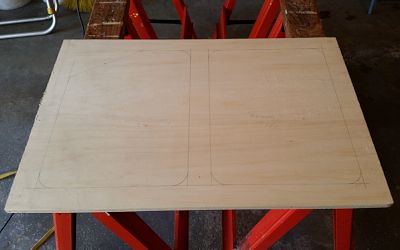
Next was a trip to Menards to buy a piece of smooth interior grade plywood that was ½" x 24" x 48". I then marked the frame design on the plywood in pencil, although it's somewhat hard to see in this picture. Prior to taking this picture I cut the overall frame out of the 24" x 48" piece. The radius used in the corners of each opening was 1". The radius on the old frame was about ½", however, I went larger in order to provide additional strength in the corners.
The first step was to drill a ¼" or larger hole in the corner of each of the two future openings in order to provide a place for a sabre saw blade to start.
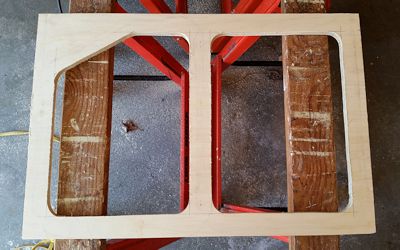
The sabre saw was then used to cut the two openings in the plywood.
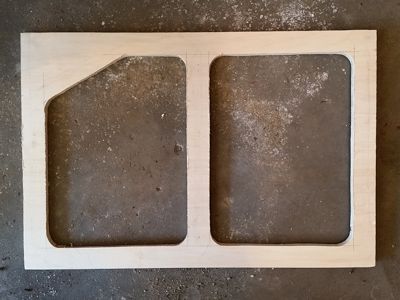
Here's another look at the newly cut plywood frame from directly above.
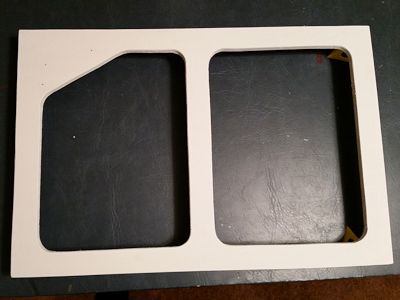
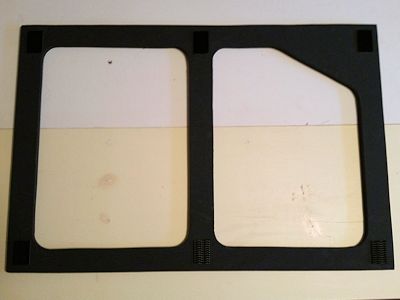
I measured the opening of the amplifier at least four times before cutting the plywood, but I was still nervous about the frame size until I placed it in the opening to test the size.
At the top of the frame is about a ¼" gap and an ⅛" gap at the sides. However, the ¼" gap will be split between the top and bottom of the opening when the new speaker grille is finished and put into place.
After cutting the speaker grille frame and testing the size I was ready continue with the project indoors and clean up the mess I made in the garage.
In the process of cleaning up and preparing the Music Room and an adjacent Storage Room, I've gone through boxes and boxes of stuff, including many VHS tapes, CD's, Cassettes, and there are even two boxes of old 8-Track tapes I need to do something with.
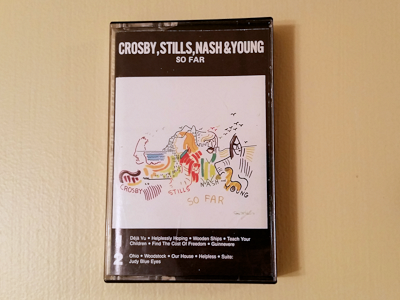
Every so often I feel like hearing some Crosby, Stills, Nash & Young. I had an old CSN&Y cassette and an old boom box handy so I popped the one shown above in and listened to it over and over while I continued working on this project.
The next step included sanding the plywood frame on the surface and all edges.
Then, with a pencil I marked the locations of where the three holes needed to be for the Fender logo. The three holes in the logo were then positioned over the marks on the plywood. Using a small Scratch Awl I made a small hole in the plywood based on the center of each hole in the logo. I then drilled three 1⁄16" diameter pilot holes to make it easy for the logo screws to go in and to find them once the grille cloth has been applied.
One coat of white "KILZ Primer" was then painted over every surface and edge of the plywood frame.
Note that there are multiple versions of the Fender logo depending on the age of the amplifier, and other logos likely have holes in different locations.
Two coats of flat black latex paint were then applied to all surfaces and edges of the frame.
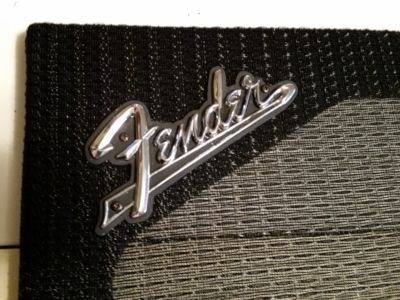
In addition to the frame, I noticed the Fender logo was missing some sections of the black background finish. So, with a little flat black paint and a fine art brush I touched up the background of the logo.
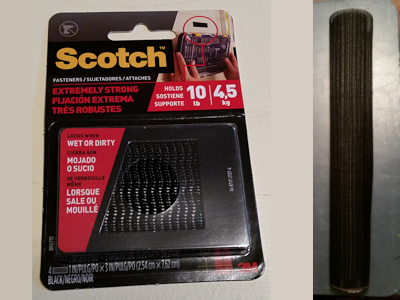
Here are a couple items needed to proceed. The first item is the Scotch Velcro.
The second is the grille cloth. After a lot of Internet searching I decided to go with "Genuine Fender Black PVC Grill Cloth, 26" x 48". Precut Piece, MPN 0026317002" off of eBay.
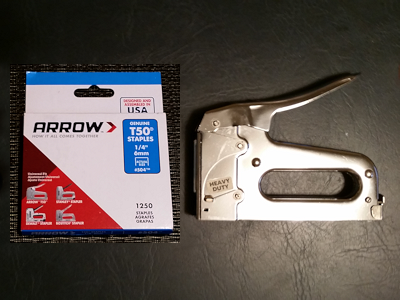
Two more items include an ARROW T50 Staple gun that I have owned forever and that you can still buy staples for. How many things like that can you identify these days?
The second was a package of ARROW T50 ¼" Staples that I also bought from Menards.
I already had several boxes of ARROW staples but they were all longer sizes than ¼". Longer staples would make the following steps more difficult as it would be hard to get the staples to go into the plywood all the way.
Important Note: Make sure the backside of the grille frame is facing up for the following steps!
The Velcro strips in the package were all 1" x 3". Three of the strips were cut in half to create six pieces 1" x 1½".
The cut Velcro strips were then applied to each corner and middle of the frame. The strips were placed about 3⁄8" from the edges of the frame in all six locations as shown in the image above. This was done to provide some good solid space to staple the grille cloth to the frame.
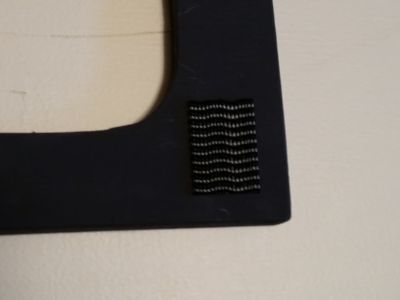
Here is a close up of the Velcro strip in a corner location.
You might wonder what the frame is setting on now in the picture. I had a couple pieces of 1" x 12" painted pine shelving boards available from a previous project, and I set them on the card table to provide a good solid surface for stapling. The card table has a bit of a soft surface that could make it a little harder to get the staples to go in all the way. The solid surface helps the stapling go better.
Two staples were used in the edge of each Velcro strip in order to secure the strips to the plywood.
Sometimes things that are "self-adhesive" seem to lose their adhesion quality after years go by. If these strips lose their adhesion, there are still staples in place to keep the strips fastened to the frame.
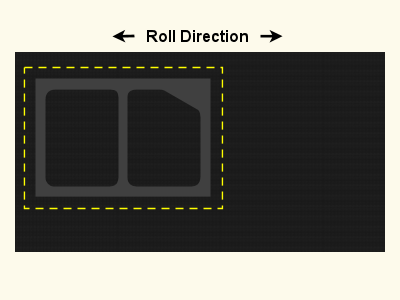
Before going further we should review a few notes about the grille cloth, direction, and stretching. The dark area in the diagram above represents the 26" x 48" Precut piece of Genuine Fender Black PVC Grille Cloth. The yellow dashed line represents the general area of the piece that I cut from for the speaker grille.
This model/type of grille cloth has a slight ability to stretch in the long (roll) direction and not too much ability to stretch in the short dimension. So, this is why the section I cut was with the long direction and not the short direction. I also noticed that the pattern in the cloth in the long direction matched the direction of the black grille cloth of my small Fender practice amplifier, and I wanted the two to match.
The piece of grille cloth I received had a little bit of irregularity in the pattern on the long edge, and that's why I avoided a couple inches in the long direction near the edge. On the short side on the left I held back about an inch because it didn't look like the short edge of the cloth was cut squarely.
I used the lines in the grille cloth as a guide for cutting in order to try and keep the rectangular area square 90°.
Position the speaker grille frame on the grille cloth leaving enough cloth on each side to be able to wrap the cloth around to the back side of the frame.
Try to align the frame with the lines in the grille cloth so the cloth will look level. Here is a closer look at the grille cloth.


Wrap the grille cloth around the frame in the middle and staple at locations 1, 2 & 3.
On the opposite side, try to stretch the grille cloth as much as you can, take another look to see if the frame still lines up with the lines in the grille cloth, and staple at locations 4, 5 & 6.
On the 1, 2 & 3 side, staple the rest of the grille cloth and try to keep the lines straight in the cloth.
On the 4, 5 & 6 side, try to stretch the grille cloth and staple the rest of the cloth on that side.
Repeat the steps on the long sides of the frame.
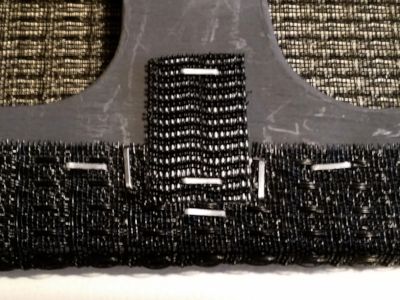
Here is a close look at where the grille cloth meets the Velcro in the middle.
Where the grille cloth meets the Velcro, staple the cloth close to the Velcro, but don't overlap the Velcro.
Then cut the grille cloth so it doesn't overlap the Velcro. I used a sharp Utility Knife to cut the cloth.
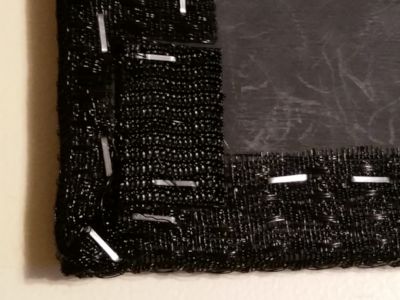
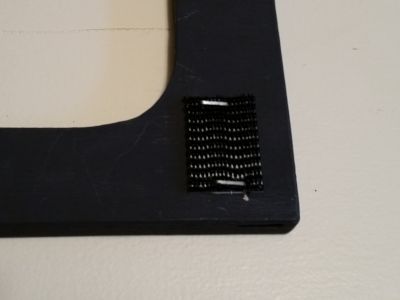
Here is a close look at where the grille cloth meets the Velcro at a corner.
Once again, where the grille cloth meets the Velcro, staple the cloth close to the Velcro, but don't overlap the Velcro. Wrap the cloth at tightly as you can at the corners.
Then cut the grille cloth so it doesn't overlap the Velcro.
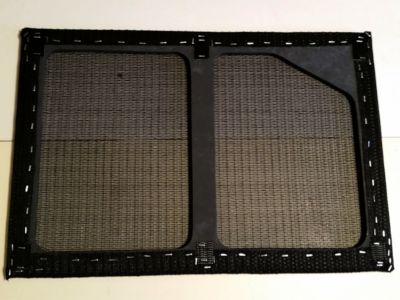
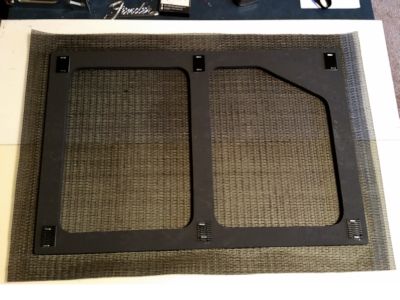
After you are done with the corners the back of the speaker grille frame will look similar to the image above.
There are 88 staples in the speaker grille frame!
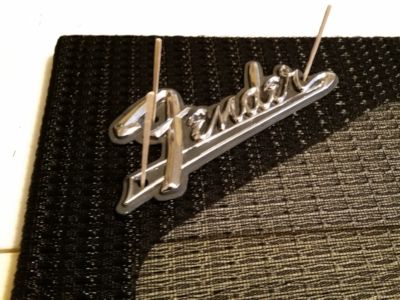
The next step includes reviewing the "Holes For Logo" details on the Speaker Grille Frame Plan to refer to the dimensions on where to locate the holes for the logo screws. Using a tape measure I measured to where the hole on the right side of the logo should be located. Using the Scratch Awl I carefully and very lightly poked through the cloth repeatedly until I located the hole. After finding the hole I placed a toothpick in the small hole to hold the location. I then repeated the process for the two screw holes on the left, as shown above.
After locating the three holes for the logo, the logo was fastened to the speaker grille frame with the three screws.
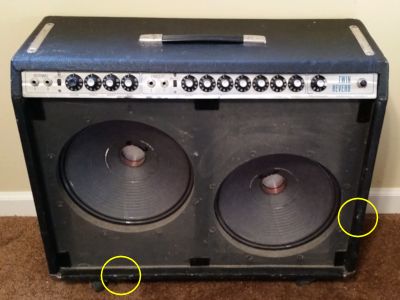
I wish I would've taken close up pictures of these two areas of damage. In both locations the black "Tolex" covering the amplifier was partially torn away from the cabinet, but thankfully not torn off and missing.
The two damaged areas were repaired using WELDBOND Glue and masking tape. Glue was placed on the back side of the Tolex. The Tolex was pushed tightly against the cabinet. Excess glue was removed with a lightly damp paper towel to prevent glue on the outside surface of the Tolex. Then, masking tape was placed over the damaged areas to hold them tightly to the cabinet. The tape was left on the damaged areas overnight and then removed. I was happy with the result.
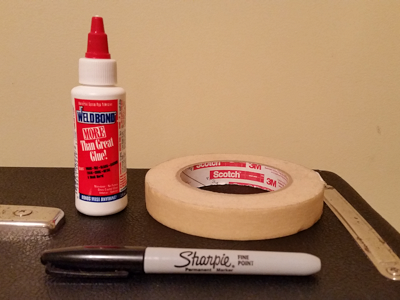
In addition to the two torn areas, the amplifier had numerous very small scuffs in the Tolex in various places. I touched these up with a black Sharpie pen to hide them a bit. I know it may sound like a cheesy way to deal with the spots I suppose, however, after doing that the bad spots blend in really well.
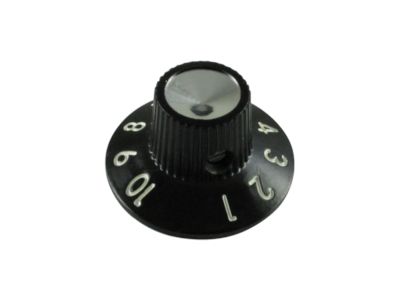
Two new knobs were ordered to replace the two damaged knobs. Finding replacement knobs was a bit tedious. I was actually looking for used Fender Twin Reverb knobs of the same age so they would match the knobs on the amplifier in terms of a slight lack of shininess. Earlier on this page I showed the back of the existing knobs. I found someone selling three used knobs of the same age and the back of the knobs matched exactly, however, they were selling them for $75 plus shipping! That was too far for me to go. Some replacement knobs are not genuine and reviewers reported the knobs they bought were a bit different. After lots of searching and giving up hope of finding reasonably priced used knobs, I bought two new genuine Fender replacement knobs that reviewers reported matched their old knobs pretty well. The knobs I bought from "amplifiedparts" on eBay look pretty good.
The finished speaker grille frame with new cloth applied was placed in the front opening of the amplifier with about an ⅛" gap on each side and top and bottom.
That's it, I'm calling this amplifier project done!
There was a large enough piece of grille cloth leftover to prepare a new grille cover for a large speaker cabinet I built years ago. I completed the Speaker Cabinet Grille Replacement project and it turned out great.

So, I've been working away on this project in multiple sessions and Louie and Stewie just lay around napping all the time! Must be nice to be a cat!